An easy way of losing weight from your rucksack is to replace the the tent pegs that come with your shelter. Whilst these aren't necessarily poor quality they tend to be heavier with a basic Y or V design.
In the past I've replaced the supplied pegs with V titanium ones. And if the pegging point isn't going to take stress then replacing that with a basic titanium wire peg. Titanium V pegs weigh about 9g and the wire ones 6g whereas supplied pegs tend to weigh about 14g.
The downside is the cost. And if your tent doesn't need many pegs then... I'll let you do the math.
MSR Mini Groundhogs are made from aluminium and weigh 9.5g each. They come supplied with a cord pull and are in an easy to spot red. They are Y pegs but with a difference the three arms of the Y are curved. The idea that this gives them better holding power.
I used them on two nights last weekend when the weather wasn't the best and found that they held really well. They need to go all the way in to maximise their holding power however they are really easy to insert. The best thing though is that they were £10.00 cheaper than the equivalent number of Titanium pegs of the same weight.
These were bought from Ultralightoutdoor gear.
Sunday, 30 July 2017
msr night glow zipper pulls
A simple and effective tent upgrade that adds less than 3g* to the shelter. They are easily installed by looping through the zip and back through the loop of the pull itself forming a simple larks foot knot. And if you're like me and have a, cough, number of tents and shelters then they can easily transfered between them.
I'm not sure whether they are best on the outer side of the fly or on the inside. Or on both!
I picked them up from Ultralightoutdoorgear.
*subject to the number put to use.
I'm not sure whether they are best on the outer side of the fly or on the inside. Or on both!
I picked them up from Ultralightoutdoorgear.
*subject to the number put to use.
Tuesday, 9 August 2016
blue dragon red thai curry paste - food find
I heard about this via a vegan food page I subscribe to on Facebook. I’m not a vegan but contributors there regularly post stuff up that also happens to be gluten free. And it happens my partner, Sarah, is vegan so this made a handy addition to our camp cooking repertoire.
There are three pastes in the range, all vegan and all GF, the others are a green Thai and Massaman one. It was the latter I was keen on trying but was unable to find it, so opted for this.
I tend only to cook from scratch when car camping or on ‘Cheeky Overnighters’ where weight isn’t an issue. And it was on one of these that the paste made its way on to the menu.
The plan was to pre-pack rice noodles, a vegetable stock cube, cashew nuts, tamari, sesame oil, and grated coconut cream. And then pick up some veggies along the way. As it happened we managed to find a ‘Chef’s Selection’ of baby corn, carrot, broccoli and mange tout which made the meal more authentic.
In a Snow Peak 1400 pot I heated the paste on a very low flame, this released the flavours but I was mindful to make sure it didn’t burn. A glug of sesame oil helped here. In went the stock cube, water, coconut, tamari and veggies. The latter I’d cut down into smaller bite size pieces. If I was cooking for one I’d have dropped the noodles in the pot too but I wasn’t, so I boiled some water in a Snow Peak 900 for the noodles whilst the curry sat in a cozy. The cashews nuts were added to it just before serving.
Juggling noodles indoors is a feat in itself and it takes on a whole new dimension when camping. But I managed the divvying up with the help of an Orikaso folding plate that clips together to form a bowl with a spout for draining stuff. The plate also doubled as a chopping board and somewhere to hold the veggies whilst I got the curry on the go.
The outcome? A very enjoyable meal. I’d certainly recommend this paste and will try the others when I’m able to track them down. Meat eaters could add fish sauce, of course, for that authentic umami taste that was obviously missing.
A couple of things to note. The Orikaso plates are no longer available in the version that I used. I carried the sesame oil and tamari in GSI condiment bottles. The Snow Peak pots nest even with the cozies on making for a compact modular cook system. I also own a 600 mug allowing me to scale the system down to a one person one.
Wednesday, 2 March 2016
peddars way preparation
The National Trails website
The annual Easter backpacking trip planning is finally underway. The National Trails website is my first place to go, followed by picking up a guidebook and a Harvey’s strip map. I then spend time reading up on the route and scanning the map for potential camping sites. Although unfortunately Harvey’s don’t do a strip map of this trail. The decision to take OS maps or rely on the guidebook alone for navigation isn’t an easy one to make. It’s a National Trail so the way marking should be decent enough, the Peddars Way is relatively straight as it follows the course of a Roman Road, and when it hits the coast… Well, how hard is it to get lost when I’ve got the sea on my left hand side? Then I have my gram weenie head saying that the OS maps will probably weigh less than the guidebook but I’m resisting the urge to whip out the scales and put them on trial.
The start of the way is in a bit of an out of the way location, and I know that others who’ve done the trail caught a cab out from Thetford and split the fare. This is a solo venture at the moment but I have since discovered that there is a bookable bus that runs to the start and costs a miserly £2.20. A no-brainer then.
As it’s Easter I’ve also emailed a couple of campsites along the trail to make sure that they were open and had space. What surprised me was the responses from two of the sites; one from a pub that had camping wanted to charge me £15.00, and made no concessions for someone in a tiny tent and who was on foot. The other from a national organisation that had a backpacker concession for non-members at £6.55 per night. Another no-brainer.
Kit list compiling is the usual straightforward deal, with the usual musings over what cook system to take based on what food I fancy, so no change there. I’m debating whether to pack all the food I need or not. I’ll have a meal out but due to my dietary restrictions I can’t rely on finding stuff on route. At least on the coast there may be options but I could find myself subsiding on chips night after night. This might not be all hardship as I’ve discovered a fish and chip shop in Hunstanton that does gluten free battered fish so one less meal to pack.
With four weeks left to go I’m also getting in some training miles when the weather allows but my right knee is beginning to complain which I’m putting down to the cold damp weather but have it strapped to be on the safe side.
Friday, 2 October 2015
marks and sparks gluten free mini pork pies
A thin wash of glaze.
A few months ago I discovered that M&S had started selling gluten free scotch eggs and they swiftly became the go-to day trip lunch item. At the time there was also some jokey dialogue going on a forum about what happened to those good old climbing/hiking food items like scotch eggs, pork pies and garibaldi biscuits. They had, for some, fallen out of fashion to ‘healthier’ options but for me the exclusion was a dietary one – I could no longer eat them.
Imagine my surprise and joy when I discovered that M&S are now doing pork pies and it goes without saying that I was scouting scotch eggs at the time, so grabbed a packet of these too.
A lack of jelly.
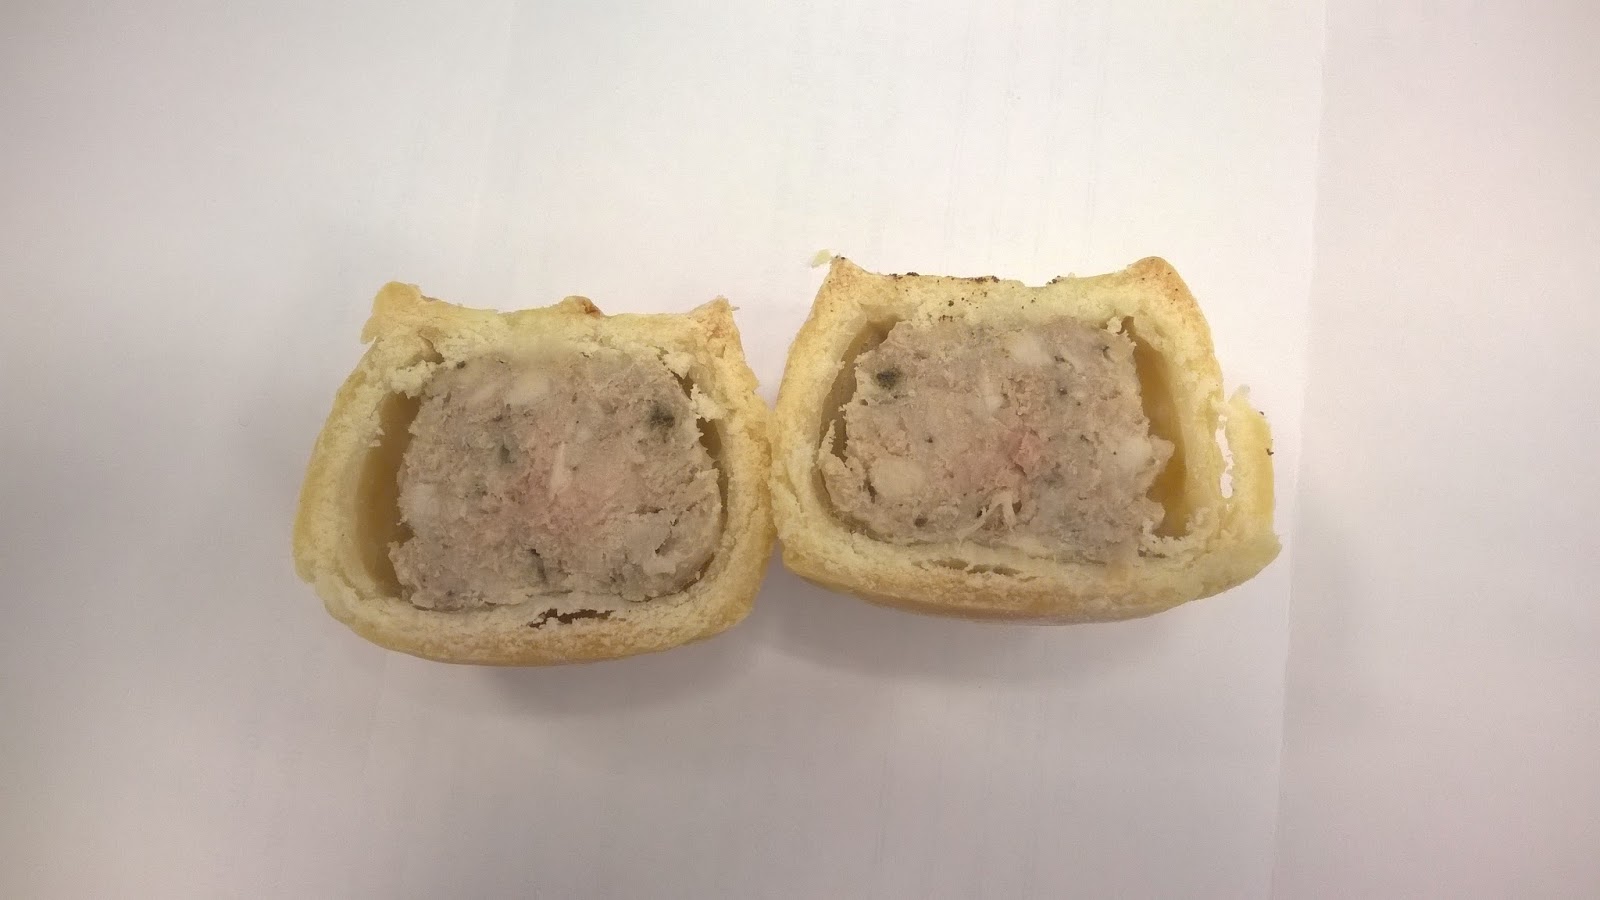
There are four mini pies in the pack weighing in at 50g each, and have the following food values 777KJ of energy, 12.3g fat, 14.3g of carbohydrate (CHO) and 4.5g of protein. And a pack of four cost circa £2.40. Being made from gluten free pastry I have to be forgiving, a bit, but I found the pastry a bit too dry. There didn’t seem to be sufficient fat content in the pastry to make the kind of crusty shell that pork pies are known for. There was an insufficient amount of glaze or lack of it on the pastry too. And the same can be said for the jelly which again is a key part of the pork pie experience. The first didn’t have any jelly and the remaining three had a small amount in the bottom of the pie with air space above. But not enough of it before it was lost. This is down to the fact that their size and the manufacturing process, no doubt. The filling again didn’t amount to much in volume but tasted well enough.
After the success of the scotch eggs I was disappointed by how these turned out. Personally I would rather have larger pies either 250g or even 500g sized ones that would have the space between the crust and filling for decent amount of jelly and would obviously contain an equally decent amount of meat too.
Friday, 11 September 2015
merino buff – thermal
The thermal weight buff
My merino wool buff is one of those bits of kit that finds its
way into my rucksack on most occasions even in the warmer months.
It’s a
versatile piece of kit that that has many uses; in winter I wear it as a
neckerchief to seal the gap around my neck and mid layer, and in summer it
becomes a beanie or nightcap to keep my head warm around camp or whilst
sleeping. The bonus of using it as a nightcap is that I can pull it over my
eyes as it’s getting lighter ensuring a few extra hours sleep after sun up.
I’m always pleased to get a kit upgrade and the guys at http://www.kitshack.com/ have sent me a thermal version of
the merino buff to try out. Effectively it’s a heavier weight version of the
original – 27% heavier – with a brushed finish and a much thicker and denser
weave, and it tips the scales at 70g.
In the middle of August trying out a thermal buff might be a
tall order, well at least I hope so, but I’ll be out bikepacking another section
of the NCN 4 in early September so will tuck it in my spare clothing dry bag. I
might not need it during the day but as a nightcap it will get some use.
Monday, 27 July 2015
Size isn’t everything
I’ve been asked how I manage to use a day pack for my weekend – and usually longer – backpacking trips.
A few years back my rucksack was a huge 65l plus bag – a Lowe Alpine one. It must have weighed a couple of kilo’s maybe more if I’m honest but I never put it on the scales. It did the job and I was able to get all my stuff in it including a rope, harness, rack and rock boots. With a crag sack strapped on the side I was all set up for a weekend of time outdoors.
At that time my camping stuff was ‘lightweight’ the tent was a two person Robert Saunders one with a huge porch and my stove was a trusty Trangia, and I carried the meths in a thirty year old one litre Sigg fuel bottle.
The first change came when I gave up the climbing part of the weekends away. That reduced the weight and bulk considerably, and meant that those 65l were no longer required. Although I still found that I could fill the space, and frequently did. And this lead me to see that, with the help of Derrick Booth’s The Backpackers Handbook, if I got a smaller bag I wouldn’t have the space to fit loads of stuff in. I started to focus on what I packed and what I used with the three pile trick. After each outing I’d rank the items I used more than once, just once, and never. And found that the items in the never category were always stuff that I put in ‘just in case’ and I had the room for. I also started looking at/and replacing items of kit. The first thing that went was the two person tent, I invested in a smaller, lighter weight one person shelter. Then the Trangia was replaced by a simple pot and cartridge gas stove, again lighter and less bulky. The synthetic sleeping bag was replaced by a warmer, lighter, less bulky down one.
The rucksack went from 65l to 55l, and again from 55l to 40l as I reduced the number of items, along with acquiring lighter and less bulky kit. Some of the items I carry have more than one use, the tent peg trowel is a prime example, it hasn’t happened yet but I’ve not needed to dig a cat hole when my shelter is pitched. Shelters that pitch with trekking poles is another example.
The weight of the kit has dramatically reduced – initially I’d be shouldering over 15kg of stuff now my average is circa 5kg (excluding the climbing kit, obviously). And the weight reduction wasn’t just with the kit on my back, my heavy leather walking boots went to lighter fabric ones, and finally to trainers weighing just 330g a shoe.
I use an Excel spreadsheet to compile the kit that I’m planning to use, this keeps me disciplined as to what goes in the bag and ensures that nothing is forgotten. I also use it to tailor the kit to the trip – time of year, terrain, environment, etc. Experience counts for a lot too – knowing what you need against what you might come across is learnt from getting out there and doing it.
It also comes down to personal preference, and this is the deal breaker – there are those that won’t feel comfortable about leaving home without something or other, usually lots of somethings or others. If you feel the kit you pack needs a backup then pack something that works and won’t let you down. (If you can’t leave the house without a secondary stove packed because you’re paranoid about the primary one failing then you need help of another kind.)
Despite all this reduction in weight and bulk comfort doesn’t suffer, my kit it will keep me warm and dry, and I’ll get a comfortable night’s sleep. I could leave the stove out on summer trips but I like a hot drink in the morning – that’s my personal preference. It’s possible for me to reduce the load further but I’m happy with what I pack and carry. For now.
A few years back my rucksack was a huge 65l plus bag – a Lowe Alpine one. It must have weighed a couple of kilo’s maybe more if I’m honest but I never put it on the scales. It did the job and I was able to get all my stuff in it including a rope, harness, rack and rock boots. With a crag sack strapped on the side I was all set up for a weekend of time outdoors.
At that time my camping stuff was ‘lightweight’ the tent was a two person Robert Saunders one with a huge porch and my stove was a trusty Trangia, and I carried the meths in a thirty year old one litre Sigg fuel bottle.
The first change came when I gave up the climbing part of the weekends away. That reduced the weight and bulk considerably, and meant that those 65l were no longer required. Although I still found that I could fill the space, and frequently did. And this lead me to see that, with the help of Derrick Booth’s The Backpackers Handbook, if I got a smaller bag I wouldn’t have the space to fit loads of stuff in. I started to focus on what I packed and what I used with the three pile trick. After each outing I’d rank the items I used more than once, just once, and never. And found that the items in the never category were always stuff that I put in ‘just in case’ and I had the room for. I also started looking at/and replacing items of kit. The first thing that went was the two person tent, I invested in a smaller, lighter weight one person shelter. Then the Trangia was replaced by a simple pot and cartridge gas stove, again lighter and less bulky. The synthetic sleeping bag was replaced by a warmer, lighter, less bulky down one.
The rucksack went from 65l to 55l, and again from 55l to 40l as I reduced the number of items, along with acquiring lighter and less bulky kit. Some of the items I carry have more than one use, the tent peg trowel is a prime example, it hasn’t happened yet but I’ve not needed to dig a cat hole when my shelter is pitched. Shelters that pitch with trekking poles is another example.
The weight of the kit has dramatically reduced – initially I’d be shouldering over 15kg of stuff now my average is circa 5kg (excluding the climbing kit, obviously). And the weight reduction wasn’t just with the kit on my back, my heavy leather walking boots went to lighter fabric ones, and finally to trainers weighing just 330g a shoe.
I use an Excel spreadsheet to compile the kit that I’m planning to use, this keeps me disciplined as to what goes in the bag and ensures that nothing is forgotten. I also use it to tailor the kit to the trip – time of year, terrain, environment, etc. Experience counts for a lot too – knowing what you need against what you might come across is learnt from getting out there and doing it.
It also comes down to personal preference, and this is the deal breaker – there are those that won’t feel comfortable about leaving home without something or other, usually lots of somethings or others. If you feel the kit you pack needs a backup then pack something that works and won’t let you down. (If you can’t leave the house without a secondary stove packed because you’re paranoid about the primary one failing then you need help of another kind.)
Despite all this reduction in weight and bulk comfort doesn’t suffer, my kit it will keep me warm and dry, and I’ll get a comfortable night’s sleep. I could leave the stove out on summer trips but I like a hot drink in the morning – that’s my personal preference. It’s possible for me to reduce the load further but I’m happy with what I pack and carry. For now.
Friday, 19 June 2015
fwe bar bag
Front view.
The FWE bar bag is a fully featured piece of bike luggage.
It mounts on the handle bars using a Rixen Kaul type bracket making it simple to remove when needed. The bag size is small compared to others, only 4 litres in capacity, but manages to hold all the bits and pieces that I want without wasted space. Importantly the smaller size means I’m less likely to overload the bag and have issues with weighed steering. The bag has a front zippered pocket with internal mesh pockets, reflective trim and a tab to mount an LED light. The bag sports two side mesh pockets, a transparent lid pocket for a mobile phone/map*, and an internal zipped pocket in the main compartment.
There is also a lower rear zippered pocket for a bright yellow rain cover that is also included, along with the obligatory shoulder strap, and the strap clipping points. I use the rain cover pocket for the strap and carry the cover in a seat stem bag instead. The one thing missing from the bag is a clip for keys, so in the front pocket I’ve added a loop of 1.5mm dyneema and a small karabiner. Clipped to this and tucked into one of the mesh pockets the keys are safe and secure.
Inside, rear view.
In use the main compartment held my camera, phone, first aid kit, jelly babies, map and my medics. The transparent lid pocket held my Garmin Geko 201, a basic GPS that’s handy for keeping track of mileage, speed and location but little else. I cannot say for certain as I don’t own a more up to date model with mapping data but the pocket might not be big enough for some devices. My mobile phone doesn’t fit (Nokia 635) so if you happen to use one of the phone based navigation apps then you might want to look at other options. I’m still a paper map navigator, predominately, so the issue of what device fits is not an issue as such other than if my phone won’t fit neither will a map (despite the manufacturer's claims)!
This aside the bag is spot on for my needs, and as with the key clip I’ll have a tinker and see if I can rig something to hold a map.
* from the manufacturer's website description.
gsi cascadian cup
Most of my canteen set ups are based around the principle that you eat and drink out of the same receptacle – a pot like the Snow Peak 600 or the Alpkit Mytimug. Whilst this is a great way of saving weight and the double usage that all lightweight backpackers like to incorporate into their kit lists it does have it’s limitations. After all you have to eat your food first and then have your drink or vice versa, unless of course that drink comes in a hip flask or wine bottle in which case it’s just a quick neck in between mouthfuls.
On occasions I like the idea
of having something handy for having a brew with the food, and swinging out of
wine bottle, whilst effective, is a bit uncouth. And on other occasions, like
when I use a cook system that doesn’t lend itself to the pot being used as a
mug, such as with my Bush Buddy set up, a dedicated mug or cup is needed.
The
classic was the plastic one pint plastic mug which is what the Snow Peak/Alpkit
set ups base themselves around but that volume isn’t always needed as I’m not
cooking with it just having a drink. And the GSI Cascadian cup at 450ml is ideal
– big enough for a brew but small enough to be packable. The mug has graduations
on the inside and the handle has a hole punched into it presumably for those
that want to hang it off their backpack. I may take a saw to the handle as I’m
not convinced I need it, and that would save some grams despite the weigh
saving hole already drilled in it! The
cup is tapered but isn’t that tall so I’ve not noticed any stability
issues with it. They come in a range of colours, and for the gram counters out
there my one weighs in at 53g.
Friday, 29 May 2015
bikepacking - laleham try out
Overnight spot.
The plan was a simple peddle along the National Cycle Network Route 4 – The Thames Valley Cycle Way – west. I knew that there was a campsite the other side of Shepperton and trains stations along the way should I need to bail. The distance to the campsite was about 15 miles so not a lengthy or arduous run as there are only a few bumps and lumps on the way where the route leaves the river.
The try out was a success and I’m planning the next leg of the route that I’ll do in the next few weeks.
The biggest lesson learnt and one of the reasons for a trial run was to get an idea of timing and distance that could be achieved. I set my cadence to that of my usual walking pace and using my old Garmin Geko 201 GPS I was able to gather data on my average speed. This happened to be 7.5 mph, which is three times my average walking speed. This meant that whilst on foot I’d cover 15 miles in a day, by bike that would equate to 45 miles. I now have a benchmark to work with when planning future trips.
Bikepacking rig - front view.
I’ll review the panniers, bar bag and another bit of new kit that I used on the trip in other posts. I didn’t get around to pitching my shelter using the bike as planned as you can see from the pictures that there was a convenient Birch tree for that job. I wasn’t entirely happy with the fact that the bike was out of view but it was secure.
Bikepacking rig - rear view.
I modified my kit list slightly to give me weights of the kit units – shelter, sleeping, cooking, spare clothes, food, and so on – so that I could evenly distribute the weight between the panniers. And as it happened the units balanced themselves out reasonably well but didn't go as far as checking the weight on the bathroom scales! The panniers coped with the volume of kit, as expected, with room for more if required. If I wanted or needed to take more or create space in the bags each bag has a pair of D rings on the top so stuff could be lashed on top. The seat post bag held the tools, spare inner, etc. with the bar bag holding wallet, keys, phone, camera, jelly babies and insulin kit. I can't see me needing anything else to carry kit in other than another bottle cage for carrying a bigger fuel bottle for longer trips. Apart from that it was just the same as any other hike.
Tuesday, 19 May 2015
Bikepacking
Packed and ready to roll.
Bikepacking – it's the same as backpacking but my bike carries
the bags not my back. And it’s something I've always wanted to have a go at.
I’m comfortable with the camping side of the activity – obviously. But I
haven’t had any experience of doing so with a bike.
There are some aspects of the activity that I’d like to have dry run at before peddling off like mad down one the of the many
cycle routes this country or further afield has to offer.
The first is mileage. I know that I can comfortably break
sections of a Long Distance Foot Path into daily chunks of fifteen or so miles
and make my way to the end point. However on a bike I can go further and at a
faster rate subject to the weight of the bike and kit that I’m carrying. And
how lumpy the terrain I’m crossing is going to be, along with stops and the
potential for detours, imposed or self-inflicted. I should also mention that I haven’t spent a
lot of time in the saddle either these past few years. With this in mind I’m working on the
assumption that fifteen miles will take three hours – for now, as my
assumptions are usually conservative.
The second is security. I can’t say I've ever noticed
Sheffield Staples at any of the campsites I've visited but then that said I
wasn't really looking for them! Some friends I know use folding bikes that take shelter
in the porch of their tents presumably with a lock on, which keeps them out of sight of potential pilfering. And there's the added bonus of the ease of taking folding bikes on trains. Arriving at the campsite
my concern will no longer about finding the best pitch but also somewhere to
secure the bike within view of the same.
The third is shelter. For a number of years my shelters of
choice have become ones that pitch with trekking poles. Not something that I’d
need on a bike! Luckily I did buy a pair of Hampton Poles to use with one of my
shelters, which will be the one I’m planning on using due to its small pack size
and its overall internal volume. It’s with this that a bit of an experiment
comes into to play… Namely with the front wheel off will my bike fit under the
shelter? Another experiment is to see if I can pitch the rear end of the
shelter using the bike itself rather than using a pole. This later point is an
interesting one as the bike will be part of the shelter, it will have a lock
on it all the same. My thinking is that a potential thief will think again about trying to steal my bike if the shelter collapses and wakes me up. It may appear that I’m
being a bit over cautious but I grew up and lived in a part of London that, “If
it wasn't nailed down it would go for a walk.”
Sunday, 22 February 2015
gluten free scotch eggs - marks & spencer
Just before Christmas there was a tongue in cheek discussion on a Facebook outdoor page about trail food. One poster was bemoaning the fact that nobody seemed to eat the classic rucksack staples such as pork pies, Garibaldi biscuits, scotch eggs, malt loaf, etc these days. I joined the discussion stating that Garibaldi biscuits were a favourite of mine because they were very durable but these days due to having to follow a gluten free diet they were off menu. As were the rest of the other items under discussion for that matter.
Not long after that I was looking for lunch in M&S and discovered that they now sell gluten free scotch eggs so they ended up in my basket in a flash. Back at the office they were gone before I could make note of the nutritional detail! And they were very tasty, a little drier than I'd like but that's gluten free food for you. A quick warm up would solve that but perfectly acceptable as a lunch when out and about. Since their discovery they have found their way in to my daypack on a number of occasions.
As you'd expect from a pork meat encrusted egg fat is high up on the count at 23g per egg (114g each approx) with protein at 13g and carbohydrate at 14g. As you can see with the amount of fat (20%) in it the scotch egg doesn't fit in today's ideal diet but if I'm out and about on the hills in winter these 'fat bombs.' are ideal for bolstering calorie intake, and are far more tastier than some alternatives.
Gone is sixty seconds
Not long after that I was looking for lunch in M&S and discovered that they now sell gluten free scotch eggs so they ended up in my basket in a flash. Back at the office they were gone before I could make note of the nutritional detail! And they were very tasty, a little drier than I'd like but that's gluten free food for you. A quick warm up would solve that but perfectly acceptable as a lunch when out and about. Since their discovery they have found their way in to my daypack on a number of occasions.
As you'd expect from a pork meat encrusted egg fat is high up on the count at 23g per egg (114g each approx) with protein at 13g and carbohydrate at 14g. As you can see with the amount of fat (20%) in it the scotch egg doesn't fit in today's ideal diet but if I'm out and about on the hills in winter these 'fat bombs.' are ideal for bolstering calorie intake, and are far more tastier than some alternatives.
Wednesday, 18 February 2015
inov8 roclite 315 trainers
(Almost) box fresh
This is my third pair in Inov8 Roclites, and these are the new look from last year’s revamp. So what’s changed?
Well, the mesh upper is now solid and has a new paint job. Although I’ve been a fan of using running shoes as my go to hiking footwear for a number of years I’ve always avoided the garishly finished makes like New Balance and Asics. The paint job on these is borderline but now with several months wear they aren’t so bright and shiny anymore. The midsole has changed to, it’s more springy than the earlier models as I seem to remember, which is good, meaning more comfortable and less tiring walking. The chunky sole remains which is great as they helped to keep me on my feet when running scree slopes in the Picos de Europa a few years back. And despite the non-mesh top the size 10s weigh less than their marque weight. However the non-mesh top isn’t an improvement on the earlier models, so it’s more water resistant than mesh but isn’t any where near as breathable. Last September when I walked a chunk of the Thames Path my feet overheated whereas with the previous mesh upper Roclites they wouldn’t have. And once damp they took longer to dry, in the past I’ve walked trainers with mesh uppers dry depending on the weather this wasn’t the case with these.
My overall view on the revamped Roclite 315s is one step forward and one back, the solid upper will be fine for the cooler months providing they stay relatively dry but I will need to invest in pair of trainers with mesh uppers for the warmer months.
One final point, I’ve used Superfeet insoles with all the Invo8 trainers I’ve owned but with the revamp they no longer fit. There must have been a change to the heel cup because first time out with them in my heel pads were pinched badly. Maybe the heel cup has been updated so that insoles like Superfeet are no longer required. I know a number of manufacturers that have been using better designs in recent years to support the heel pads so this may be just another development with the trainer. Not that this is an issue as I’ve already got many hundreds of miles use out of them so am not out of pocket and there still may be need for them with future purchases.
Monday, 16 February 2015
trailstar tarp-a-like
I have to thank fellow Backpackers Club member Darren Long for introducing me to this pitch. I own a BPL Duo Tarp and in the past to give good weather protection I've used a standard three sides to the ground pitch with the opening on the leeward side of the weather as shown below.
With this pitch there is a lack of privacy, it’s best to use a bivibag and sleep with your feet towards the entrance for maximum weather protection, and pitched this way gives enough room for two. In the past I've pitch the entrance with the cover of a wall – not the best view but it does prevent prying eyes.
However the pitch that Darren introduced me to goes one further and creates a smaller entrance and a beak giving more weather protection and better privacy. I've called this the Trailstar pitch after the MLD shelter as they are similar in shape as seen here.
Pitching is straightforward with the long edge at the back corners pegged first followed by the front. Take each corner and peg in line with the next tab in making sure the edges are tight. Fix a guy to the front middle tab and insert trekking pole under the tarp and guy out (with the Duo Tarp the pole sits under a tab). Then put intermediary pegs on the side and back edges. Take each of the corners and tie back to the peg on the side. Take your second trekking pole and set a riser at the rear to give a bit more room. Pitched like this there is plenty of room for one, headroom is good to at circa 120cm towards the entrance and with the entrance being sheltered you should be able to cook under cover. This was a test pitch and although easy enough to muster, I suggest having a few dry runs at it as I did find I needed to tweak it to get a decent enough tightness to the tarp. Incidentally Darren used bungee tie-outs which would help with this.
The instructions I have state that the wings on the sides can be re-positioned, along with the beak, to cover the entrance although I've not tried this yet but it looks a bit of a faff. On a recent meet Darren used an umbrella to block the entrance instead which is a simpler solution.
For those that are having trouble following the above there's a link here to a video using a DD 3x3m tarp, the method is the same but the shape is obviously different.
With this pitch there is a lack of privacy, it’s best to use a bivibag and sleep with your feet towards the entrance for maximum weather protection, and pitched this way gives enough room for two. In the past I've pitch the entrance with the cover of a wall – not the best view but it does prevent prying eyes.
However the pitch that Darren introduced me to goes one further and creates a smaller entrance and a beak giving more weather protection and better privacy. I've called this the Trailstar pitch after the MLD shelter as they are similar in shape as seen here.
Pitching is straightforward with the long edge at the back corners pegged first followed by the front. Take each corner and peg in line with the next tab in making sure the edges are tight. Fix a guy to the front middle tab and insert trekking pole under the tarp and guy out (with the Duo Tarp the pole sits under a tab). Then put intermediary pegs on the side and back edges. Take each of the corners and tie back to the peg on the side. Take your second trekking pole and set a riser at the rear to give a bit more room. Pitched like this there is plenty of room for one, headroom is good to at circa 120cm towards the entrance and with the entrance being sheltered you should be able to cook under cover. This was a test pitch and although easy enough to muster, I suggest having a few dry runs at it as I did find I needed to tweak it to get a decent enough tightness to the tarp. Incidentally Darren used bungee tie-outs which would help with this.
The instructions I have state that the wings on the sides can be re-positioned, along with the beak, to cover the entrance although I've not tried this yet but it looks a bit of a faff. On a recent meet Darren used an umbrella to block the entrance instead which is a simpler solution.
For those that are having trouble following the above there's a link here to a video using a DD 3x3m tarp, the method is the same but the shape is obviously different.
Thursday, 6 November 2014
kabuto gluten free rice noodles
![]() |
| There it was - gone! |
These make an ideal lunch or supper meal on the trail; one pot for lunch and I’d double up for supper. The miso one has 54.7g CHO and 261 calories. And there’s nothing to state that you can’t pimp the noodles with additional ingredients if you have them to hand, adding torn young nettle or dock leaves for example. On day hikes I wouldn’t bother to repackage but on longer trips I’d lose the cup and place the ingredients in a poly bag but remember make a note of how much water you need! With all these types of ‘instant’ noodles it’s just a matter of added the required amount of boiling water, stirring and leaving to stand for three minutes or so. I’d recommend giving them a stir a couple of times during that period because the first time I tried them some of the noodles were a bit chewy.
Monday, 27 October 2014
msr folding spoon
![]() |
I came across the MSR folding cutlery set whist searching for something else and decide to purchase a spoon and give it a try. The set also has a spork and fork, and are colour co-ordinated with other MSR cookware. Their folded length is 12cm and they weigh 10g.
The spoon is currently nesting happily in my AGG Three Cup Pan, along with an AGG Pepsi can stove, pot lifter, lighter and GSI Cascadian Cup making a complete canteen set up. I’ve yet to try to see whether it will integrate with some of my other set ups. But looking at my smallest capacity system, a set up based around my Snow Peak 600 mug, it fits in the mug with my Coleman F1 stove but a small (200g) gas cartridge no longer fits snugly in as it did without the spoon. I rarely use that as a cooking pot preferring systems based on the larger Snow Peak 900 these days. It’s a long handled spoon, being twice its folded length, which is handy if you use a freezer bag cooking method or eat retort meals. The only downside I can see at the moment is that the bowl of the spoon is smaller than the one I’m used to.
Wednesday, 22 October 2014
food find – nairn’s gluten free biscuit breaks
Like the 9Bars that I blogged about here, these have become a lunchtime stable and have found their way into my rucksack.
There are three varieties but the two that I favour are the oat & syrup and chocolate chip. The four biscuit pouch has 188 calories and circa 24g of carbohydrate, the slight variation is because the choc chip ones have a little more CHO. And, of course, they are gluten free. The biscuits have a great crunch and texture with the oat & syrup winning on the latter. Although I’ve not tried it yet the oat & syrup ones would make a great crumble topping on some stewed apple, with some Bird’s Instant Custard on the side - yum!
Tuesday, 21 October 2014
lowe alpine jetstream 2.5 cap – first look
It’s annoying having to replace lost kit. Tent pegs and other small items can get lost amongst the grass but losing an adult sized black baseball cap is hard to reconcile.
Not wanting to be without some sort of weather resistant head gear I popped into Cotswolds for a replacement. Despite stocking TNF Apex items they didn’t do the cap that I blogged about here.
The Lowe Alpine Jetstream 2.5 cap was the best of what was on offer. The cap comes in one size, is water and windproof not water or wind resistant like the former, being made from Lowe Alpine’s Triplepoint material with sealed seams, and a wicking Dryflo headband. (Another Lowe Alpine material that they use for base layers.) It weighs 50g so is 10g lighter too. There is a single pull elastic toggle to tighten the headband at the rear for when the wind picks up, and a reflective strip. This is clearly meant for those who go out in the dark for a run. But is also handy if you happen to find yourself on an unlit country lane going to/from the pub/campsite as I did at the weekend.
Despite the unseasonably dry, warm October weather I have been lucky enough to find some dampness this week. As I expected the material beaded well and, for me, the big win is that the larger splodges didn’t penetrate the material like they did with the Apex material because Triplepoint is fully waterproof not just resistant. The peak made an effective shield against the elements too. The only thing about the cap that’s a bit of a worry is that there is an opening at the rear approx. 80x60mm in size which leaves that part of my head exposed to the elements. But in anything more than a shower I’d expect to have the hood of my waterproof up so that wouldn’t be an issue on those occasions.
Stock photograph supplied by Ascent Marketing.
Not wanting to be without some sort of weather resistant head gear I popped into Cotswolds for a replacement. Despite stocking TNF Apex items they didn’t do the cap that I blogged about here.
The Lowe Alpine Jetstream 2.5 cap was the best of what was on offer. The cap comes in one size, is water and windproof not water or wind resistant like the former, being made from Lowe Alpine’s Triplepoint material with sealed seams, and a wicking Dryflo headband. (Another Lowe Alpine material that they use for base layers.) It weighs 50g so is 10g lighter too. There is a single pull elastic toggle to tighten the headband at the rear for when the wind picks up, and a reflective strip. This is clearly meant for those who go out in the dark for a run. But is also handy if you happen to find yourself on an unlit country lane going to/from the pub/campsite as I did at the weekend.
Despite the unseasonably dry, warm October weather I have been lucky enough to find some dampness this week. As I expected the material beaded well and, for me, the big win is that the larger splodges didn’t penetrate the material like they did with the Apex material because Triplepoint is fully waterproof not just resistant. The peak made an effective shield against the elements too. The only thing about the cap that’s a bit of a worry is that there is an opening at the rear approx. 80x60mm in size which leaves that part of my head exposed to the elements. But in anything more than a shower I’d expect to have the hood of my waterproof up so that wouldn’t be an issue on those occasions.
Stock photograph supplied by Ascent Marketing.
Friday, 17 October 2014
calorie and carb counting
Being a type 1 diabetic my overriding concern when out on a
hike was how much carbohydrate (CHO) I’d need to keep me going, replace the glycogen
in my body, and prevent hypoglycaemia (dangerously low blood sugar levels).
Over the weekend, among many of the conversations I had, one
discussed weigh loss when on the trail. This got me thinking about the calorific
value of the food I pack, and whether it met the demands of a day’s hiking.
The starting point was to establish my BMR (basal metabolic
rate) this is an estimate of the minimum amount of calories needed to keep body
functioning whilst at rest. I used the one on the myfitnesspal website here. Once
I’d established that figure, I found an Activity Factor formula which is a
basic multiplier of the BMR subject to the level of activity – see below.
Little/no exercise
|
BMR * 1.2
|
Light exercise
|
BMR * 1.375
|
Moderate exercise (3-5 days/wk)
|
BMR * 1.55
|
Very active (6-7 days/wk)
|
BMR * 1.725
|
Extra active (very active & physical
job)
|
BMR * 1.9
|
A simple Excel spreadsheet did the trick. I’ve highlighted
what I thought that would apply to time out hiking in the hills, and the
formula determined that I would need 2,900 calories to maintain that level of
activity. I then set about calculating how many calories I’d consumed listing
them in the same spreadsheet. The outcome was a bit of an eye opener – I was
short by circa 600 calories, that’s an approx. 20% shortfall. This probably is
a factor in how I’ve managed to stay trim – which isn’t a bad thing. Whilst
doing this exercise I also analysed the amount of CHO I consumed. This was also
very revealing as it indicated that I need to increase the amount of CHO
consumed at the end of the day, to top up the glycogen reserves, and to avoid an
overnight slingshot hypo (never a good thing, and potentially life threatening).
In this instance, the shortfall was made up with a portion
of chips and a few jars of cider. But going forward I’ll be re-introducing the
stalwart Bird’s Instant Custard as a pudding with a cake bar or similar, not
for the calories per se as I’d like to keep my figure, but for the necessary
CHO loading.
Tuesday, 16 September 2014
tnf apex baseball cap
Nicely beaded droplets
Being follicly challenged I’ve accrued a sizable number of head gear options over the years. The baseball cap is the mainstay for summer (with a SPF 30+ material) and the Lowe Alpine Mountain Cap for the coldest times of the year, with a number of options for in between these situations.
The autumn/winter of 2013/14 was reasonably warm but very wet so a good opportunity to try out a soft shell cap. TNF Apex material has been around for a while and is reasonably weather resistant. Of all the soft shell materials I’ve tried I’ve found that they fall short, never being wind or rain resistant enough. Incidentally, TNF now make a complete wardrobe from the fabric so you can kit yourself out in trousers, jacket, gloves and hat – if that sort of thing rocks your boat.
The cap is black, comes one size, and it weighs 60g.
Despite my reservations of all things soft shell I’ve got a lot of use out of the cap during those months. Although not totally windproof I haven’t found that an issue with the mild weather we had – with my head staying comfortable. In the rain it beaded well initially but again regular use dictates regular cleaning and re-proofing to maintain this. Larger drops/driven rain penetrated the material and it wetted out as I would have expected over time. Once wet the material was slow to dry.
Given the range of head gear I’ve collected there clearly isn’t an ideal piece of kit, and the TNF Apex baseball cap has become another option in the range I have at my disposal.
Subscribe to:
Posts (Atom)


.jpg)